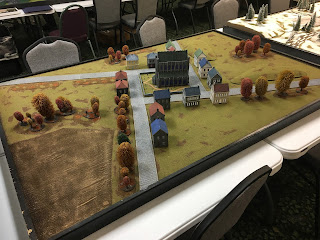
Tanksgiving 8,000 pt Flames of War AAR Part 3: Turns 4-6, and afterthought
*I'll have to apologize at this point. We were pretty far into the game and between the quickness of the turns and my phone dying I may have missed some of the pictures of some of the wreckage.*
Turn 4
At this point the Soviets work on trying to finish off whole platoons to whittle us down. The T-34's continue their shuffle to their left flank to bring the might of the Soviet horde to bear. The IS2's open on the Shermans in the woods destroying 1 and bailing 3 more. They also bailed out my jumbo in the other platoon but didn't seem to put that much fire into the rest. The center has become a stand still of the IS2's and 76's blasting each other.
 |
| Soviets still work on shifting left |
 |
| Left flank moves to flank Shermans |
 |
| IS2's and Shermans still fighting it out in the center |
The US spends this turn with their left flank still trying to chase down the retreating right flank of the Soviets which at this point have dug in the remaining IS2's to slow us down. The Priests open up on the SU152's bailing one. The M10's are still trying to snake through town and manage to do some damage taking out 1 IS2 and 2 T-34's. The Sherman's in the center (last pic above) fire back destroying 2 of the IS2's and bailing 1. On our right flank we mount up the Shermans and return fire bailing 2 T-34's and 1 ISU122
Turn 5
The Soviets continue their push hard on their left flank and in the center. The SU152's continue to push past the platoon of Shermans we have covering behind the buildings just outside of the woods. And in this turn we find out as they open up on the mortars (which were playing a pivotal part by spotting for the priests the entire game so far) killing two. The SU122's continue to maneuver around the Shermans in the woods but don't manage a hit. The IS2's in the center of town still pound it out with the 76mm Shermans managing to take out 1.
 |
| Soviets open up on the mortars |
At this point the US's left flank is still maneuvering around the wreckage in town to try to chase down the Soviets. Erik has done a good job of effectively making our left flank useless even with the losses he took. The Shermans in the center continue their dance with the IS2's trying to outmaneuver and finish them. They open up killing 1 more IS2 forcing a moral check which they fail and we finally see the center held by the US. The priests continue to be brutal opening up on a platoon of T-34's that moved at the double destroying 2 and bailing 1. The 2 platoons of Shermans outside and in the woods continue to try to hold off the Soviet push. 1 platoon opens up on the SU152's destroying 1 more. The other opens up on the T-34's destroying 1 forcing another check which they again fail and run.
Turn 6
At this point I think Erik realized the assault was grinding to a halt and stops pushing forward and takes up defensive firing points. His platoon of IS2's I've been chasing finally stops and he turns around the T-34's for extra support. He opens up on his left flank bailing the rest of the Shermans in the woods. The 152's open up trying to finish off the rest of the Shermans just outside the woods but luckily they all make their saves.
This turn goes quickly for the US as we rush to try to finish off the stragglers of platoons. The remounted Shermans circle around behind the SU152's and finish them off bringing the Soviets to 50% which meant a Company check next turn.
We realize that as difficult as we made taking the town difficult for the Soviets by placing Stuarts for wreckage, it made it just as difficult for us to chase them back down
Turn 7
The Soviets roll their Company Morale check and fail leaving Steve and I to breath a sigh of relief as what's left of the horde turn tail and flee.
US final thoughts
Speaking for myself, I was pretty surprised we pulled a win out of this. Steve and I felt confident with our plan going into this but I thought it'd only carry us as far as beating Erik up a bit before he'd overwhelm us. We knew using the Stuarts as road blocks would be a little dirty, but it was a trick pulled from Erik's book after all. I was surprised that my standard 75mm Shermans did as well as they did. I honestly thought they'd get rolled over pretty quickly, but they held their own and even dished out a decent amount. In the end, I think our plan was pretty solid and we were able to stay focused to work on taking out whole platoons and control the flood of what made it across the table and when. For my company, I'd say my Priests took MVP. They hit every turn and dealt a good deal of damage. For Steve, his 2 platoons of 76mm Shermans in the center held the town pretty much on it's own even after helping repulse the push on our left flank.


